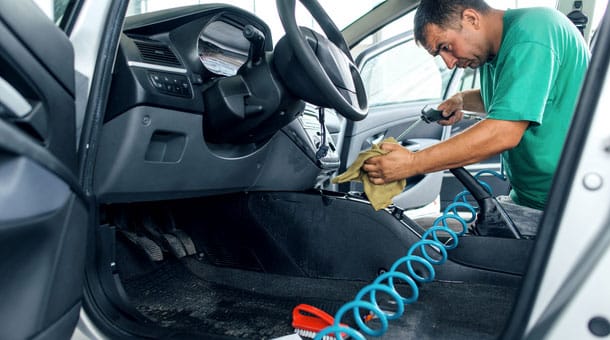
Detailing a car goes far beyond the typical cleaning and vacuuming process. It involves paying attention to the small factors that create a show-stopping car. Start with the interior to ensure you don’t have to worry about ruining your exterior while sprucing up the interior.
Learn more about Cleaning
How to Clean a Car Interior:
Step 1: Remove Your Car Floor Mats
Floor mats can be great to protect your carpets; however, over time, a lot of dirt and grime could be trapped beneath. Wear your gloves and walk around the inside of your car, taking care to take off the floor mats completely to see the actual state of the carpet.
Step 2: Empty The Car Interior & Light Vacuum
You must empty your car of personal belongings and any other large garbage that your vacuum can not be able to collect.
Take your first garbage bag and store your personal belongings, like checks, books, insurance papers, changes, or other items vital to you. When you’re finished, place the bag on the side to keep it safe.
Take the second garbage bag and remove all large garbage items, like empty plastic bottles or even large chunks of food. Whatever your vacuum is having trouble getting rid of, place it in your second trash bag to throw away.
Step 3: Clean the Dashboard and Door Panels and the Center Console
“After finishing my interior and exterior, I applied Plastic Restore to all the interior trim and plastic except for the trunk and a small part, the dash. Plastic Restore did a great job and was very uniform in color.”
Beginning with your dashboard, take a clean microfiber towel, and divide it in half. Use a spray of Intra Clean onto your towel and then rub it over your dashboard, making sure to get rid of the dirt and grime as well as you can.
If you notice that your towel is drying out, you can spray more cleaner on the towel and continue to clean until you are satisfied. After cleaning the surface with your first cleaning towel:
- Take the cleanest microfiber cloth and smooth the area you cleaned to give it a smooth finish.
- Get rid of any remaining inside cleaner.
- Continue the process on your door panels and the centre console, using your cleaning brushes to go into all the crevices and corners within your car.
It’s the perfect time to add some extra protection to your dashboard. The interior Detailing Kit includes Intra Shield, which provides protection for your interior.
It protects you from harmful UV radiation. It is suggested to give your interior a quick vacuuming to ensure that there is no dust remaining visible on the dashboard.
Spray the Intra Shield and rub it into the dash using a dirty microfiber towel. Utilize a second, clean microfiber to remove the remaining product. Do not touch the surface for the next 24 hours, allowing the product to dry.
Step 4: Clean Vinyl & Leather
Leather and vinyl are strong materials. However, if the improper product is used or left to sit on the floor for too long, it could cause permanent damage. Therefore, be sure to utilize specific leather and vinyl cleaning products!
Take your leather and vinyl cleaner and spray it onto your detailing brush. Then begin to clean the surface of the leather and vinyl gently. Take a dirty microfiber towel and clean off the cleaning solution that remains.
Step 5: Cleaning Crevices and Vents
It’s time to tackle all the corners and nooks like air vents; there’s not much room to work in these areas, which is why it’s the ideal moment to get out the best-detailing brush!
Use your detailing brush to remove as much dirt and dust as possible from your vents. After you spray a tiny amount of interior cleaner onto the brush, agitate it, then wipe it down, making sure you remove all dirt and leftover cleaner.
Step 6: Vacuuming Carpets & Car Seats
Now is the time to sweep all the dirt off your carpets and car seats! Start your vacuum on the driver’s side, and begin cleaning the seats in your vehicle. Be sure to recline your seat and make sure to get spaces between your edges as well as the bolsters.
Then you should push your seat to the back of your seat as far as it is possible and begin to vacuum your carpets. Repeat this throughout the car, making sure you shift your seats around to ensure you don’t miss any dirt.
Step 7: Shampooing carpets and Upholstery Seats
After cleaning your vehicle with a strong vacuum, it’s time to wash your upholstery and carpets. Start with your seating area. Start with your upholstery cleaner and gently mist the areas you’re working on, and then, using a firm bristle cleaning brush scrub the area until it’s clean.
Spray more shampoo or carpet cleaner on areas with a lot of stains and allow it to remain on the surface for a couple of minutes to remove the stains.
After cleaning the shampoo, take a dirty microfiber towel, and use it to scrub your seats to eliminate the most feasible shampoo residue.
It is also possible to take your vacuum cleaner and clean out any excess moisture and dirt in the upholstery. Repeat the procedure on the remainder of your car, including carpets, until you are satisfied.
Step 8: Protecting Your Car’s Interior Surfaces
After you’ve spent all day cleaning your vehicle, it’s time to protect it from UV-damaged things like vinyl, plastics and even leather.
Starting with your plastics & vinyl, take your choice of interior conditioner/protectant and spay it on a new microfiber towel.
Then rub the protectorate onto all of your vinyl and plastic surfaces making sure you evenly spread if you’re happy with how the surface looks, then great! If the gloss is too shiny for you, use a different microfiber towel, and then matte the gloss to a level that you’re happy with.
Complete the same process on the leather but with a dedicated leather conditioner/protectant. You must ensure you don’t apply a plastic or vinyl conditioner or protector on the leather since they’re two different kinds of surfaces.
9: Eliminating Odors Car Interior Sanitation
After the car is neat, we must ensure that the vehicle is completely clean! The interior sanitation and removal of odours will depend on your vehicle’s needs.
There are many products to remove odours and sanitation and equipment on the market; therefore, the procedure will depend on your chosen product. Most sanitation is done with alcohol and hydrogen peroxide-based disinfectants, steam cleaning equipment, and ozone machines that will cost you hundreds, up to thousands.
Disinfectant sprays or wipes are a simple method to disinfect important surfaces like door handles and steering wheels. Be sure to clean all interior surfaces before applying your car’s interior protection. If you do not, it could be possible to strip your protection.
For lingering odours, I would suggest using an Enzyme based odour eliminator. They’re typically in the form of aerosols and can be kept in the vehicle for a few hours, eliminating the majority of unpleasant odours inside your car’s interior.
Step 10: Don’t Forget the Trunk!
Many people, including detailers, forget to clear the trunk! Therefore, clean the area of any large items in addition to giving it a deep vacuum.
Sometimes, a brush for cleaning is beneficial for trunks because of the less durable carpet typically found in trunks. Clean the fabric of your trunk with your brush, and then follow up with a powerful vacuum to clean grime and dirt. Repeat the process, and apply carpet shampoo or interior cleaner if required.
How long does it take to detail a car?
Car Detailing is a specialised service based on the chosen package; the duration can vary from four hours up to seven days—the time for detailing increases and becomes more aggressive, the more deteriorating the vehicle’s condition. Along with polishing time, cars are cleaned first using an appropriate-sized wash, tar remover and clay removal.
What do detailers use?
Pro detailers employ coloured, task-specific microfiber towels and cloths to improve effectiveness, reduced friction, scratching, and faster cleaning, rinsing, and drying.
How long does it take for a car interior to dry after cleaning?
It depends on the way the seats were washed and the temperature outside. However, based on our experiences, the seats are 90% dry within 2.5 minutes if it’s relatively warm outside. If it’s cold out or there’s a cloudy sky, the seats could take 3 to 5 hours to dry.


